
Building a Raspberry Pi5 Cluster with Talos Linux and Cilium
You know when you want to have an environment to play with, test some things, and do some general tinkering around?
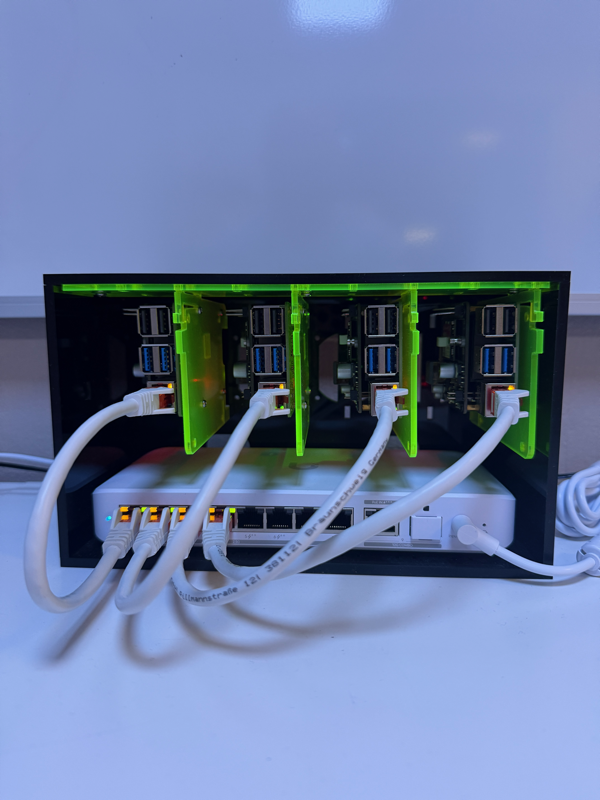
Of course you can run this on your laptop (Very Happy Macbook Pro M4 Max owner!) but where is the fun in that? So, I decided to build a Kubernetes cluster consisting of Raspberry Pi's. Now I am the kind of guy that does not go half way, so this cluster not only needs to be small and quiet, but also powerful. Which means I am building this with not a single Raspberry Pi board, but a full-fledged cluster with high-availability and everything.
Here is a picture of the end result:
Let me take you through how I build this!
Table of Contents
Kit list
Click to view complete shopping list
For those of you that want to know and possibly want to build this themselves, here is the full kit list:
| Item | Amount | Cost at time of writing of article | Total Cost | Where ordered? |
|---|---|---|---|---|
| Raspberry Pi 5 - 16GB | 4 | € 131,50 | € 526 | RaspberryPi Store |
| 512GB Raspberry Pi NVMe SSD, 22x30mm | 4 | € 54,95 | € 219,8 | RaspberryPi Store |
| Sandisk 32Gb MicroSDHC Extreme PRO | 1 | € 16,95 | € 16,95 | RaspberryPi Store |
| Geekworm Cooler for Raspberry Pi 5, passive aluminum heatsink | 4 | € 9 | € 36 | Amazon |
| M.2 NVME M-Key and PoE+ HAT for RPi5 | 4 | € 36,29 | € 145,16 | Kiwi El4ctronics |
| Ubiquiti UniFi Flex 2.5G PoE | 1 | € 199,65 | € 199,65 | KommaGo |
| Ubiquiti AC Adapter 210W | 1 | € 105,88 | € 105,88 | KommaGo |
| C4Labs 8-Slot Cloudlet Cluster Case | 1 | € 72,74 | € 72,74 | The Pi Hut |
| Grand total | € 1249,44 incl. BTW |
I realize this list does not fit everyone's budget, but it is what I went with. Yes, you could get a cheaper PoE switch, but I love Ubiquiti and it is my go-to choice for networking gear. You could get Raspberry Pi4 with just SD Cards in stead of SSD's, of course you can! That is the beauty of these projects, you can do it however you want! In this case, this is my blog and my project so this is what I used.
The cluster case I ordered from a company in the UK, and if you are not located in the UK then, it gets a bit more expensive - like a lot more expensive. That was a bit of an oversight from my part, there is a good alternative here: https://www.amazon.com/GeeekPi-Cabinet-Equipment-RackMate-Rackmount/dp/B0DPGZPTPP?th=1. I don't own a 3D printer but if you do, there are some very good cluster cases out there for you to print yourself. I also removed the fans from the case cause I hate noise - that is where the passive heatsink comes in.
Lastly I had to purchase some network cables to make it all look nice.
Putting it all together
Installing Talos
For those of you that are unfamiliar with Talos: Talos is a Linux distro that is optimized for Kubernetes and is secure, immutable and minimal by default, limiting your Kubernetes attack surface. All system management is done via an API - there is no shell or interactive console.
If you are interested in the philosophy behind this, have a read here.
Installing Talos was a little less easy than I expected, mainly because the Raspberry Pi5 is not officially supported yet. Here is an overview of the (non-Pi5) supported Raspberry Pi series: (https://docs.siderolabs.com/talos/v1.11/platform-specific-installations/single-board-computers/rpi_generic). After a quick search I found a Github repo here that ported the offial Talos image to work on Raspberry Pi5. Give them a star to support their work!
Preparing the Raspberry Pi
I had a previous Raspberry Pi OS Lite installed with K3S so my Pi had to be cleared out first:
sudo umount /dev/nvme0n1p?
sudo wipefs --all --force /dev/nvme0n1p?
sudo wipefs --all --force /dev/nvme0n1
sudo dd if=/dev/zero of=/dev/nvme0n1 bs=1024 count=1
Also, you want to make sure the boot order is changed so that the Pi attempts NVMe boot first. This does assume you already have an OS on your Pi5:
# Open the Raspberry Pi configuration editor
sudo raspi-config

# Navigate to Advanced Options > Boot > Boot Order
# Highlight 'NVMe/USB Boot' and press enter
# Follow the prompts
When you do not have an OS on your Pi5 yet, you can flash your SD card using the Raspberry Pi Imager. For OS, choose Misc utility images, Bootloader (Pi5 Family), NVMe/USB Boot and start your Pi5 using this card. Once the green light flashes, the Pi5 is configured to boot from NVMe first.
Flashing the OS to an SD Card
On a side note, make sure you use specific fast SD cards as the Pi5 does not like slow cards. The type from the shopping list is good. On another note, I used 1 card. You can get more cards if you are impatient and do not want to re-flash in between tasks.
Here is where it gets a little more interesting. You would think that we flash the Talos OS onto the SD card, right? Well, no, we don't. After spending quite a few hours, I found out that even when you select the NVMe card as the install disk, it just would not install to it. Here is the associated Talos config (that, to be clear, did not work for me):
machine:
  install:
    disk: /dev/nvme0n1 # The disk used for installations.
    image: ghcr.io/siderolabs/installer:v1.11.1 # Allows for supplying the image used to perform the installation.
    wipe: true # Indicates if the installation disk should be wiped at installation time.
I worked around the problem by flashing the SD Card with Raspberry Pi OS using the Raspberry Pi Imager Raspberry Pi OS (other), Raspberry Pi OS Lite (64 bit).
I then used this card to boot the first Pi into Pi OS and then downloading the Talos OS:
curl -LO https://github.com/talos-rpi5/talos-builder/releases/download/v1.11.1-pre/metal-arm64.raw.zst
unzstd metal-arm64.raw.zst
You only need to do this once. Make sure you set the hostname and then use the downloaded image to flash your NVMe disk. Repeat this on each of your nodes:
sudo hostnamectl set-hostname rpi5-1
sudo dd if=metal-arm64.raw of=/dev/nvme0n1 bs=4M status=progress
Make sure you set a unique hostname for each node! Shutdown the node after this step is complete, remove the SD card and power on the node again; it should now boot from the SSD drive.
Preparing Talos Config
To perform any kind of management on Talos, you need to communicate (securely) with the API. In this blog, I use talosctl for management.
brew install siderolabs/tap/talosctlOnce you have talosctl installed, we can create the config to deploy the cluster. We are going to install Cilium, for which we need a Talos Patch to prepare Talos for it. Specifically, no cni should be enabled and kube-proxy will be disabled as it will be replaced by Cilium. The last line will allow workloads to be scheduled on control plane nodes, which is fine for this lab environment but in a production environment maybe not such a good idea.
> cat <<EOF > ./cilium-patch.yaml
  machine:
    install:
      disk: /dev/nvme0
      image: ghcr.io/siderolabs/installer:v1.11.3
      wipe: true
    network:
      interfaces:
      - deviceSelector:
          physical: true
        dhcp: true
  # view more in the complete command sequence
Click to see the complete command sequence
cat <<EOF > ./cilium-patch.yaml
  machine:
    install:
      disk: /dev/nvme0
      image: ghcr.io/siderolabs/installer:v1.11.3
      wipe: true
    network:
      interfaces:
      - deviceSelector:
          physical: true
        dhcp: true
        vip:
          ip: 10.10.10.15
  cluster:
    network:
      cni:
        name: none
    proxy:
      disabled: true
  allowSchedulingOnControlPlanes: true
EOF

export CONTROL_PLANE_IP=10.10.10.11
mkdir _out
talosctl gen config talosrpi5 https://$CONTROL_PLANE_IP$:6443 --output-dir _out --config-patch @cilium-patch.yaml
This will create 3 files in the _out directory:
- talosconfig - this is the unique context for your cluster that contains the certificates for authentication
- controlplane.yaml - for configuring control plane nodes
- worker.yaml - for configuring worker nodes
⚠️ Note: You want your cluster nodes to have a fixed IP address. I found out that starting with DHCP and then setting a fixed IP as part of configuration basically broke the setup. The solution was to make a DHCP reservation for each node in your cluster, making sure that the nodes will always get the same IP address from DHCP.
Install Talos on the first node
We are now ready to configure the first cluster node. Make sure the node is up and has the correct IP address; if you hooked up a display to your RPi then you should see this on screen.
export CONTROL_PLANE_IP=10.10.10.11
talosctl apply-config --insecure --nodes $CONTROL_PLANE_IP --file _out/controlplane.yaml
export TALOSCONFIG="_out/talosconfig"
talosctl config endpoint $CONTROL_PLANE_IP
talosctl config node $CONTROL_PLANE_IP
talosctl bootstrap ## <-- this command only needs to be run ONCE on a control plane node!
If all went well, you can use talosctl health to check the status of your Talos cluster. Get the Kubernetes config using the following command:
talosctl kubeconfig --nodes $CONTROL_PLANE_IP
kubectl get nodes
# you should see something like this
NAME STATUS ROLES AGE VERSION
rpi5-1 Ready control-plane 1h v1.34.0Install Talos on other nodes
I would recommend to take care of Cilium first, then install the rest of the nodes.
Install Cilium
For those of you that are unfamiliar with Cilium: Cilium is an open-source, eBPF-based networking, security, and observability platform designed for cloud-native environments such as Kubernetes clusters and containerized workloads. Cilium operates as a Container Network Interface (CNI) and provides an advanced, kernel-native framework for container networking, combining eBPF-based performance, granular security, and deep observability.
Start by installing the Cilium CLI as described on https://docs.cilium.io/en/stable/gettingstarted/k8s-install-default/#install-the-cilium-cli
Next I am going to use Helm to install Cilium onto the cluster using Terraform (actually, I used OpenTofu). For a complete list of values and how to further customize the Helm deployment, look here
terraform {
  required_providers {
    kubernetes = {
      source  = "hashicorp/kubernetes"
      version = ">= 2.38.0"
    }
    helm = {
      source  = "hashicorp/helm"
      version = ">= 3.0.2"
    }
  }
  required_version = ">= 1.10.0"
}
# view more in the complete command sequence
Click to see the complete Terraform configuration with all Helm values
terraform {
  required_providers {
    kubernetes = {
      source  = "hashicorp/kubernetes"
      version = ">= 2.38.0"
    }
    helm = {
      source  = "hashicorp/helm"
      version = ">= 3.0.2"
    }
  }
  required_version = ">= 1.10.0"
}

provider "kubernetes" {
  config_path = "~/.kube/config"
}

provider "helm" {
  kubernetes = {
    config_path = "~/.kube/config"
  }
}

resource "helm_release" "cilium" {
  chart            = "cilium"
  name             = "cilium"
  repository       = "https://helm.cilium.io/"
  version          = "1.18.2"
  create_namespace = false
  namespace        = "kube-system"

  set = [
    {
      name  = "ipam.mode"
      value = "kubernetes"
    },
    {
      name  = "kubeProxyReplacement"
      value = "true"
    },
    {
      name  = "securityContext.capabilities.ciliumAgent"
      value = "{CHOWN,KILL,NET_ADMIN,NET_RAW,IPC_LOCK,SYS_ADMIN,SYS_RESOURCE,DAC_OVERRIDE,FOWNER,SETGID,SETUID}"
    },
    {
      name  = "securityContext.capabilities.cleanCiliumState"
      value = "{NET_ADMIN,SYS_ADMIN,SYS_RESOURCE}"
    },
    {
      name  = "cgroup.autoMount.enabled"
      value = false
    },
    {
      name  = "cgroup.hostRoot"
      value = "/sys/fs/cgroup"
    },
    {
      name  = "k8sServiceHost"
      value = "localhost"
    },
    {
      name  = "k8sServicePort"
      value = 7445
    },
    {
      name  = "gatewayAPI.enabled"
      value = true
    },
    {
      name  = "gatewayAPI.enableAlpn"
      value = true
    },
    {
      name  = "gatewayAPI.enableAppProtocol"
      value = true
    }
  ]
}
If you want to check what versions are available for Cilium, run the following commands:
helm repo add cilium https://helm.cilium.io/
helm search repo cilium --versions

</div>

```bash
# results are something like this
NAME            CHART VERSION   APP VERSION     DESCRIPTION
cilium/cilium   1.18.2          1.18.2          eBPF-based Networking, Security, and Observability
cilium/cilium   1.18.1          1.18.1          eBPF-based Networking, Security, and Observability
cilium/cilium   1.18.0          1.18.0          eBPF-based Networking, Security, and Observability
...
Apply the Terraform code and wait for Cilium to be fully deployed. This can take a bit, be patient.
You can check the status of deployment with either kubectl or the cilium cli.
Install Talos on other nodes
Now that Cilium is installed, we can install the other Talos nodes. When you install Cilium straight after the first Talos node is deployed, the rest of the nodes automatically have the correct Cilium config.
Because of etcd cluster quorum (a two-node etcd cluster is not high availability (HA) because if one node is lost, the cluster will have quorum loss and enter read-only mode), we are going to deploy a total of 3 control plane nodes (hence the allowSchedulingOnControlPlanes: true config, otherwise we would only have 1 worker node on which to deploy workloads).
CONTROL_PLANE_IP=("10.10.10.12" "10.10.10.13")
WORKER_IP="10.10.10.14"
for ip in "${CONTROL_PLANE_IP[@]}"; do
  echo "Applying config to worker node: $ip"
  talosctl apply-config --insecure --nodes "$ip" --file _out/controlplane.yaml
done
talosctl apply-config --insecure --nodes "${WORKER_IP}" --file _out/worker.yaml
The end result will be a 4-node Talos cluster that looks something like this:
kubectl get nodes

NAME     STATUS   ROLES           AGE   VERSION
rpi5-1   Ready    control-plane   1h    v1.34.0
rpi5-2   Ready    control-plane   1h    v1.34.0
rpi5-3   Ready    control-plane   1h    v1.34.0
rpi5-4   Ready    <none>          1h    v1.34.0

> cilium status

    /¯¯\
 /¯¯\__/¯¯\    Cilium:             OK
 \__/¯¯\__/    Operator:           OK
 /¯¯\__/¯¯\    Envoy DaemonSet:    OK
 \__/¯¯\__/    Hubble Relay:       disabled
    \__/       ClusterMesh:        disabled

# view more in the complete command sequence
Click to see complete cluster status and pod listings
kubectl get nodes

NAME     STATUS   ROLES           AGE   VERSION
rpi5-1   Ready    control-plane   1h    v1.34.0
rpi5-2   Ready    control-plane   1h    v1.34.0
rpi5-3   Ready    control-plane   1h    v1.34.0
rpi5-4   Ready    <none>          1h    v1.34.0

cilium status

    /¯¯\
 /¯¯\__/¯¯\    Cilium:             OK
 \__/¯¯\__/    Operator:           OK
 /¯¯\__/¯¯\    Envoy DaemonSet:    OK
 \__/¯¯\__/    Hubble Relay:       disabled
    \__/       ClusterMesh:        disabled

DaemonSet              cilium                   Desired: 4, Ready: 4/4, Available: 4/4
DaemonSet              cilium-envoy             Desired: 4, Ready: 4/4, Available: 4/4
Deployment             cilium-operator          Desired: 2, Ready: 2/2, Available: 2/2
Containers:            cilium                   Running: 4
                       cilium-envoy             Running: 4
                       cilium-operator          Running: 2
                       clustermesh-apiserver
                       hubble-relay
Cluster Pods:          20/20 managed by Cilium
Helm chart version:    1.18.2
Image versions         cilium             quay.io/cilium/cilium:v1.18.2@sha256:858f807ea4e20e85e3ea3240a762e1f4b29f1cb5bbd0463b8aa77e7b097c0667: 4
                       cilium-envoy       quay.io/cilium/cilium-envoy:v1.34.7-1757592137-1a52bb680a956879722f48c591a2ca90f7791324@sha256:7932d656b63f6f866b6732099d33355184322123cfe1182e6f05175a3bc2e0e0: 4
                       cilium-operator    quay.io/cilium/operator-generic:v1.18.2@sha256:cb4e4ffc5789fd5ff6a534e3b1460623df61cba00f5ea1c7b40153b5efb81805: 2

talosctl health
discovered nodes: ["10.10.10.11" "10.10.10.12" "10.10.10.13" "10.10.10.14"]
waiting for etcd to be healthy: ...
waiting for etcd to be healthy: OK
waiting for etcd members to be consistent across nodes: ...
waiting for etcd members to be consistent across nodes: OK
waiting for etcd members to be control plane nodes: ...
waiting for etcd members to be control plane nodes: OK
waiting for apid to be ready: ...
waiting for apid to be ready: OK
waiting for all nodes memory sizes: ...
waiting for all nodes memory sizes: OK
waiting for all nodes disk sizes: ...
waiting for all nodes disk sizes: OK
waiting for no diagnostics: ...
waiting for no diagnostics: OK
waiting for kubelet to be healthy: ...
waiting for kubelet to be healthy: OK
waiting for all nodes to finish boot sequence: ...
waiting for all nodes to finish boot sequence: OK
waiting for all k8s nodes to report: ...
waiting for all k8s nodes to report: OK
waiting for all control plane static pods to be running: ...
waiting for all control plane static pods to be running: OK
waiting for all control plane components to be ready: ...
waiting for all control plane components to be ready: OK
waiting for all k8s nodes to report ready: ...
waiting for all k8s nodes to report ready: OK
waiting for kube-proxy to report ready: ...
waiting for kube-proxy to report ready: SKIP
waiting for coredns to report ready: ...
waiting for coredns to report ready: OK
waiting for all k8s nodes to report schedulable: ...
waiting for all k8s nodes to report schedulable: OK

kubectl get pods -A

NAMESPACE       NAME                                               READY   STATUS    RESTARTS      AGE
kube-system     cilium-9tff5                                       1/1     Running   0             1h
kube-system     cilium-envoy-f8z4f                                 1/1     Running   o             1h
kube-system     cilium-envoy-jnj94                                 1/1     Running   0             1h
kube-system     cilium-envoy-qdwcn                                 1/1     Running   o             1h
kube-system     cilium-envoy-ww9pq                                 1/1     Running   o             1h
kube-system     cilium-kxkxb                                       1/1     Running   0             1h
kube-system     cilium-mvggt                                       1/1     Running   0             1h
kube-system     cilium-operator-54d6f6cccb-bkn8k                   1/1     Running   0             1h
kube-system     cilium-operator-54d6f6cccb-cdvz9                   1/1     Running   0             1h
kube-system     cilium-w9fvm                                       1/1     Running   0             1h
kube-system     coredns-7bb49dc74c-nbrd2                           1/1     Running   0             1h
kube-system     coredns-7bb49dc74c-xjkw8                           1/1     Running   0             1h
kube-system     kube-apiserver-rpi5-1                              1/1     Running   0             1h
kube-system     kube-apiserver-rpi5-2                              1/1     Running   0             1h
kube-system     kube-apiserver-rpi5-3                              1/1     Running   0             1h
kube-system     kube-controller-manager-rpi5-1                     1/1     Running   0             1h
kube-system     kube-controller-manager-rpi5-2                     1/1     Running   0             1h
kube-system     kube-controller-manager-rpi5-3                     1/1     Running   0             1h
kube-system     kube-scheduler-rpi5-1                              1/1     Running   0             1h
kube-system     kube-scheduler-rpi5-2                              1/1     Running   0             1h
kube-system     kube-scheduler-rpi5-3                              1/1     Running   0             1h
What's next?
Now that Talos and Cilium are ready, start deploying other services to your cluster. Think about ArgoCD, cert-manager, external-dns or get an intro to what Cilium can actually do with the Star Wars Demo.
Have fun!